
iOS 17 was easily the best year SwiftUI ever had. It’s the gift that keeps on giving. We got Observation, advanced Mapping, and, best of all, Metal Shaders!
One neglected, but incredibly powerful part of this release was something I’ve been wanting to write about for ages: Keyframe Animations!
These are an advanced kind of animation that gives you total control.
Vanilla SwiftUI animation interpolates between from and to values when some state changes, defined by a simple timing curve. With keyframes, you can fully define the path taken by a movement, a transformation, or a value over time, with different timing curves for every part of a movement. This brings a whole ‘nother level of customisation and composability!
Keyframe animations contain a series of tracks. These define a timeline of points, which define exactly how a property will vary between each segment. Moving an object from point A to point B, you can, for example:
Tell it to use a physically-accurate cubic curve to accelerate for the first 100px.
Move smoothly and linearly for the next 300px.
As it comes to a stop, create a whimsical spring motion as it comes to a stop.
You can orchestrate the same animations for virtually any property such as size, opacity, scale, 3D rotation, and even hue.
This is great if your properties conform to Animatable. But there are instances where you might be asked to animate something arbitrary, like a flip-book animation switching between many images at once. Perhaps your designer sadistically demanded an accelerating flipping speed for this animation.
SwiftUI provides a lesser-known API that makes this an absolute cakewalk. You can read out values from keyframe animation tracks and apply them to anything, anywhere. After today, there will be nothing you can’t animate.
In a minute, I’m going to bang on about:
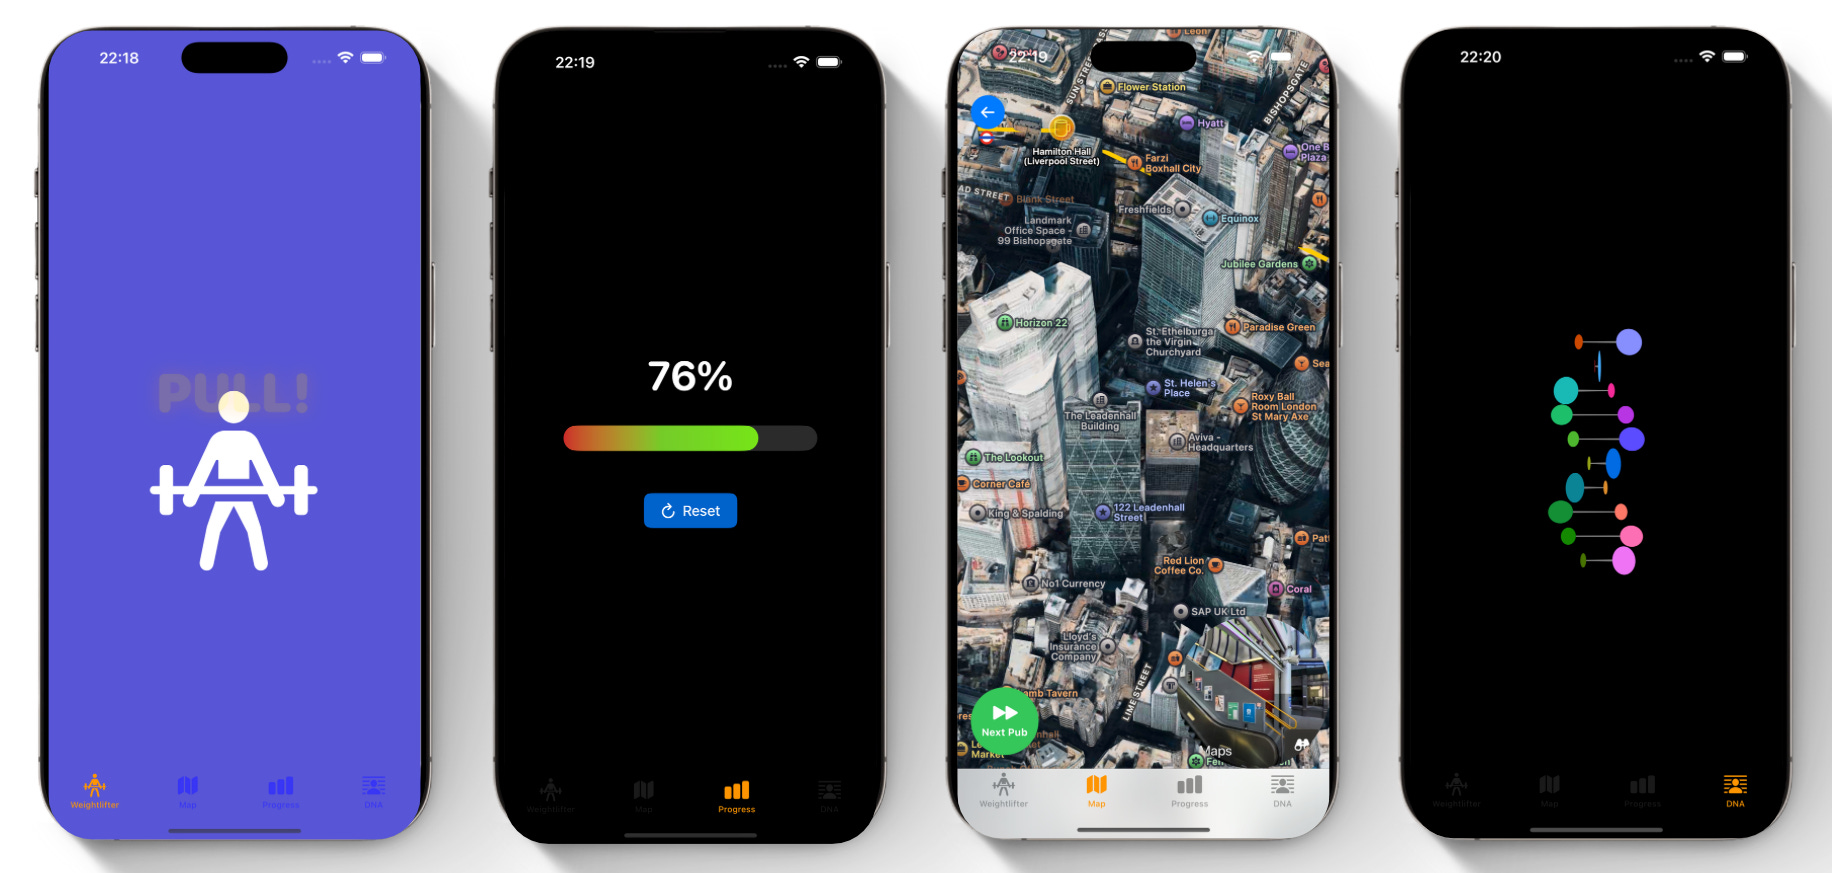
To demonstrate everything, I created a sample project that demonstrates the various ways you can apply the keyframe APIs in your code:
Etymology: What is a keyframe?
Etymology is the study of the origin of words and the way in which their meanings have changed throughout history. Understanding a word often helps you to build your intuitive mental model, and keyframes are no different.
The term “keyframe” originates from Disney in the 1930s, specifically, the way they divided responsibility for hand-crafting their animation:
Master animators would draw “key” frames established between character poses and facial expressions.
Junior animators drew the intermediate animation frames between these.

Disney designed their animation production process around keyframes, introducing timing charts that specified how many frames existed between each keyframe. They introduced twelve principles of animation to create lifelike characters, several of which can still be felt in digital animations today:
Slow in, slow out (think ease in-out)
Physics-based timing (think spring motion)
Squash and stretch (think liquid glass)
Flash animation made digital keyframe animations available to the masses, spurring on the heyday of incredible dial-up-powered videos I enjoyed during my formative years. Core Animation had caught up by the time iOS came about.
Now, before we start writing our own keyframes, because this is Jacob’s Tech Tavern, let’s briefly look at how they work under the hood.
Under the hood of Keyframes
While SwiftUI is built on top of Core Animation for rendering, it is unclear whether it directly ports CAKeyframeAnimation under the hood, or provides its own implementation. There isn’t much documentation on SwiftUI keyframe internals.
Therefore, this section is semi-speculative, but we can make the educated assumption that they at least work pretty similarly to CAKeyframeAnimations. Just so long as you agree to take this section with a pinch of salt and enjoy the ride.
When any animation is rendered, the system gathers information. The start & end states, alongside any animation timing curves, are placed on a render tree. This data structure is managed by the system and invisible to your app. This tree is traversed at 60fps (or 120fps) to render animations. Keyframe animations, essentially, supply a series of timing curves to the tree instead of a single one.
When some state changes, from the perspective of your app, the new value is immediately applied. The system’s render server then applies maths to animation timing curves in order to calculate the intermediate states. These intermediate states are interpolated from timing curves to render each frame:
Calculate the current time elapsed by the animation.
Determine which keyframe track is being applied.
Work out where this keyframe segment begins and lands.
Within the segment, calculate the frame’s position based on timing curve:
linearKeyframe: Simple weighted averagecubicKeyframe: Solves cubic Bézier equations for smooth curvesspringKeyframe: Solves a harmonic oscillator equationmoveKeyframe: No interpolation, just jumps to the end state
Here’s what these timing curves look like. Each point is a new keyframe, and the timing curve determines the trajectory a value takes to the next keyframe.

So it’s basically maths, but you could probably work that one out. Time for a practical demo.
Practical Keyframe Animations
In classic Tech Tavern fashion, I made a little sample project you can check out and enjoy as we go through the examples. I advise you to muck around with them to learn how each animation looks and feels, to get a better grasp yourself.
Basic setup with keyframeAnimator and KeyframeTrack
In a perfect example of Swift’s progressive disclosure principles, you pretty much know the score when you’ve seen a single example of the API. The angels are in the details of its flexibility.
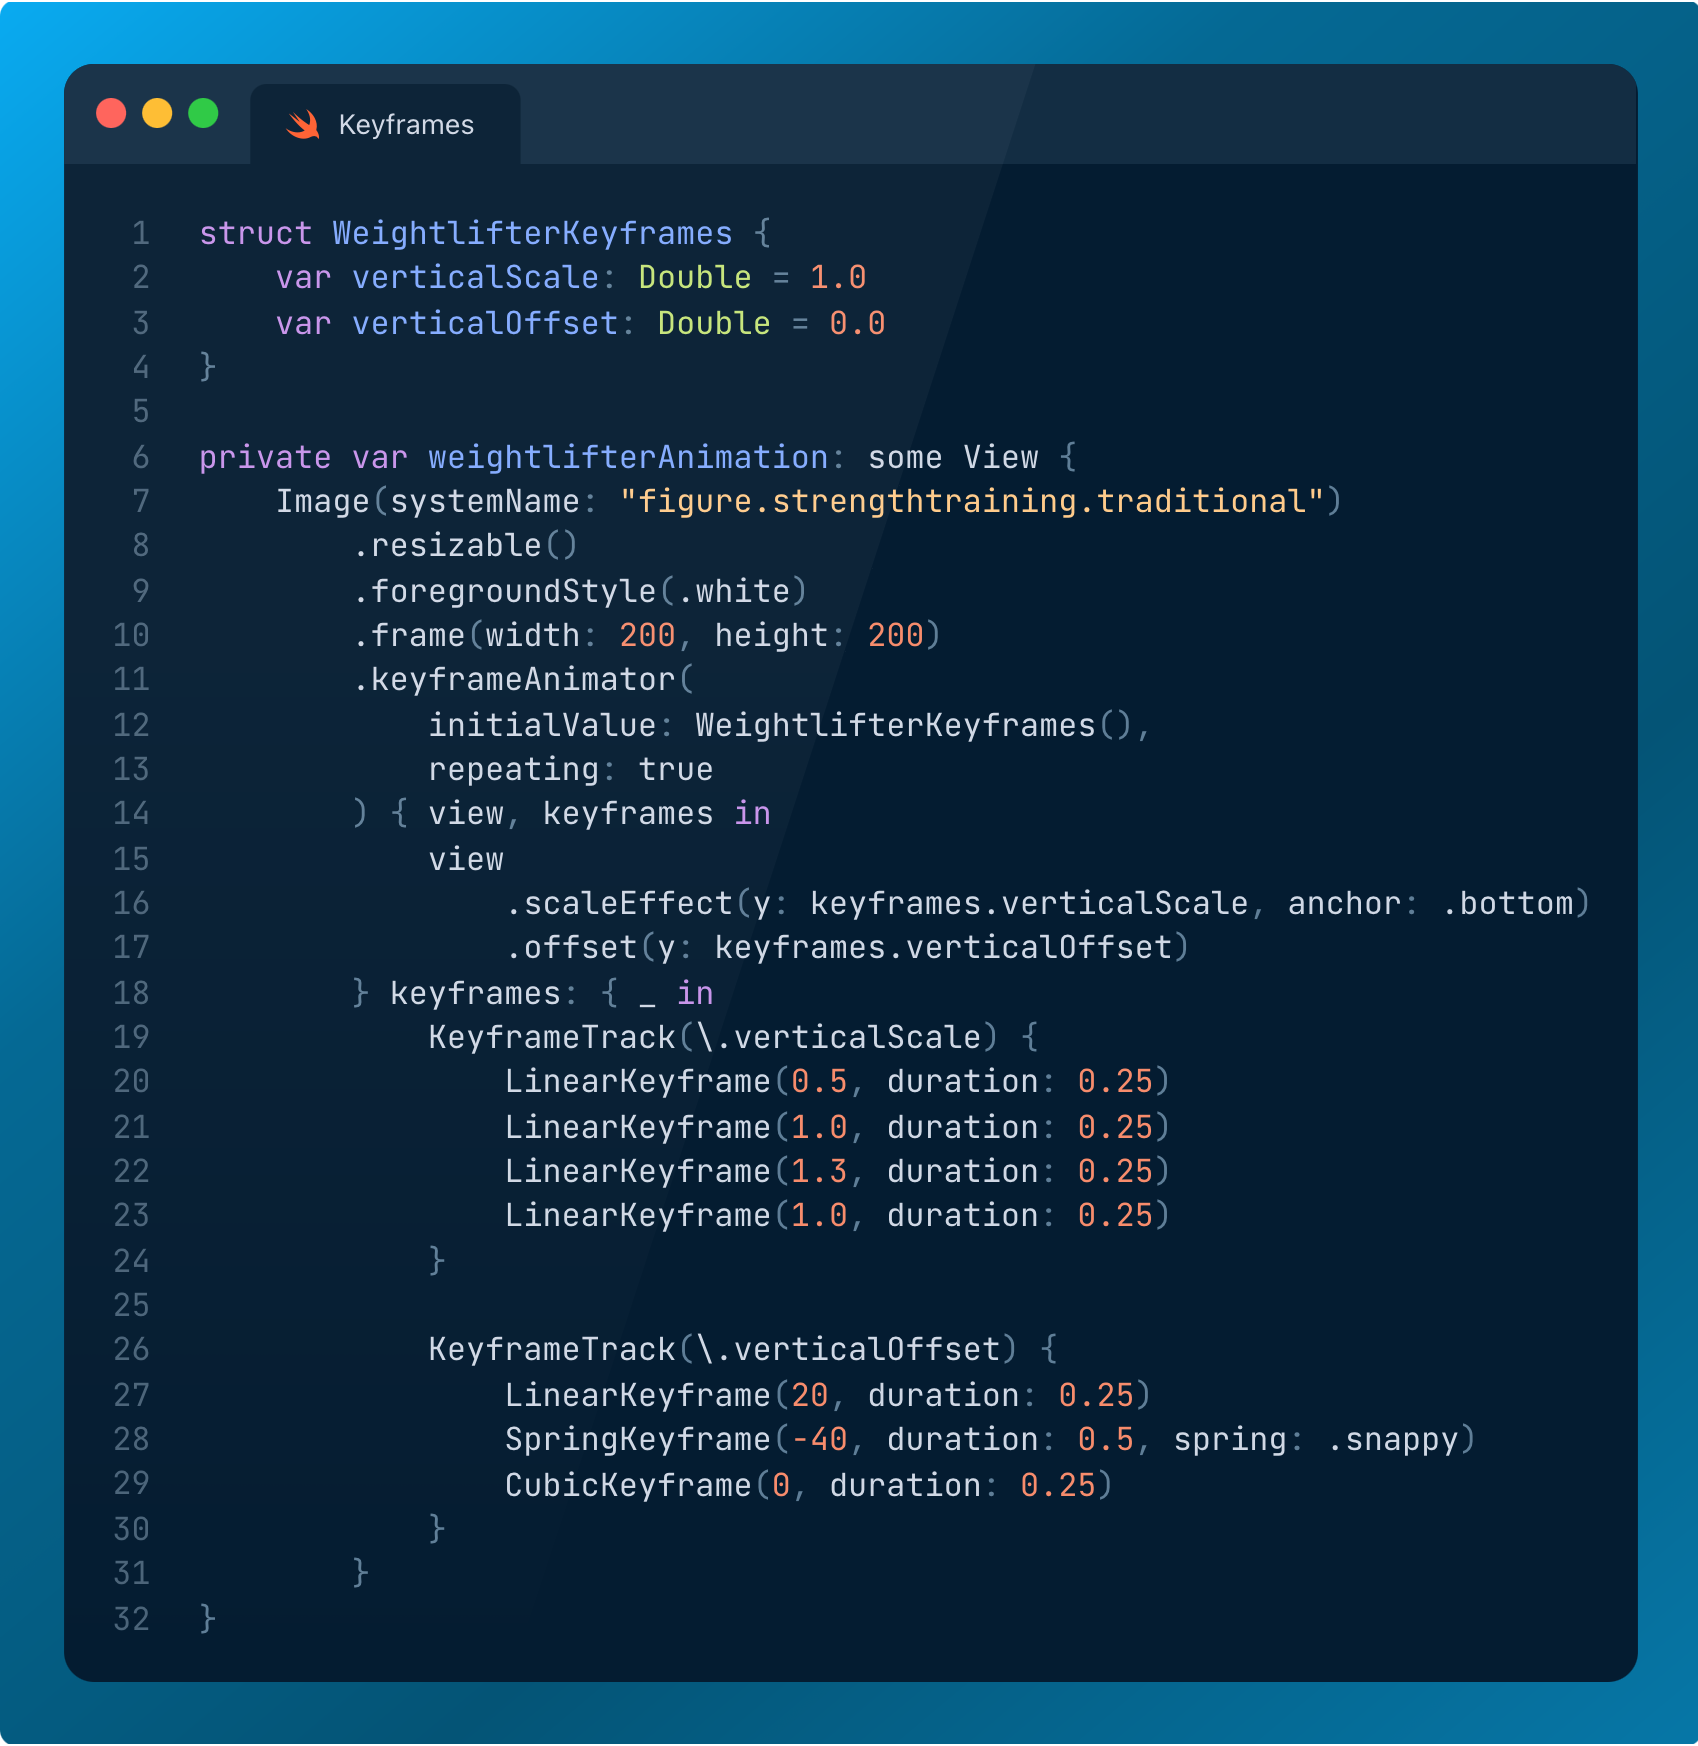
Here’s a cute little animation of an exaggerated weightlifting clean and jerk, which is usually the opposite order in which I do things.
This looks elaborate because there are lots of things being animated on screen, but each individual keyframe animation is very simple once you see it.
The basic API has a few key moving parts:
.keyframeAnimator() allows you to create the keyframes, and configures the initial values of the animation state.
WeightlifterKeyframes is a plain Swift struct that wraps the values of the properties we want to change over the course of the animation.
The first closure applies modifiers and effects to the view, using the values we are modulating in our keyframes struct.
KeyframeTrack that lets you define the changes on a selected property inside the WeightlifterKeyframes struct individually.
LinearKeyframe defines a linear timing curve that changes the value of the selected property in the keyframe track over a defined time period.
Simple enough? Let’s see it in the sample code.