Core Image: The Basics
Distinguish your app with this underrated framework
Subscribe to Jacob’s Tech Tavern for free to get ludicrously in-depth articles on iOS, Swift, tech, & indie projects in your inbox every two weeks.
Paid subscribers unlock Quick Hacks, my advanced tips series, and enjoy exclusive early access to my long-form articles.
The camera is the prime differentiator that elevates mobile experiences above the web. Without it, the biggest social apps today such as TikTok, Snapchat, and Instagram simply wouldn’t work.
In the early days of smartphones, cameras were crappy, hardware was slow, and there were no first-party image processing tools. Clever devs used filters to make photos look better — writing custom graphics shaders with OpenGL to eke out what they could from a 2010 phone CPU.
Life is different today: cameras are professional-grade, processors are screamingly fast, and high-level APIs make it easier than ever to process images in your app.
With modern tech comes modern challenges — with the camera app market so saturated, photos on your app need to look better than the rest of the competition.
On iOS, knowing Core Image is the first stage of this differentiation.
Today I’ll explain how Core Image works, demonstrate how you can use it in your apps today, and discuss the many system filters.
If you’re impatient, and not averse to spoilers, you can download my CoreImageToy app on the App Store and check out the open-source project on GitHub.
Core Image
Core Image was introduced way back in 2005 with OS X Tiger, but wasn’t ported to iOS until iOS 5 in 2011.
Core Image was designed to offer a simple API for high-performance image processing — applying multi-core parallelism to transform each pixel without you, the developer, needing to worry about it.
Core Image is based around Filters, which individually define some kind of processing for an image — for example, adding a blur effect, adjusting the colour, or distorting its geometry.
Filters can be chained together, meaning you can combine filters. For example, you can chain a sepia colour filter, to a Gaussian blur, to a glass-lens distortion.
Core Image is also designed to be pluggable, meaning that you can create your own custom CIFilters which integrate seamlessly with the filters bundled in the framework. Whoever said object-oriented programming is dead, eh?
Core Image Performance
Core Video is actually implemented using Core Image. To ensure that Apple could handle real-time video processing (even in 2005!), Apple applied several techniques to ensure sure it could render each frame in under 1/60th of a second (or whatever the frame-rate du jour is).
Filters and Parallelism
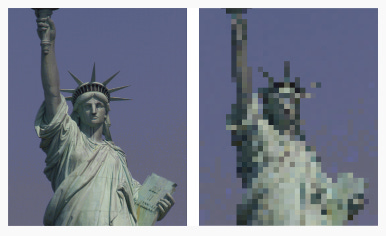
What is an image?
It’s essentially a big ol’ grid of pixels.
A basic colour filter is conceptually very simple:
Take the RGBA colour for a pixel, perform some mathematics, and then return a modified colour.
Now do the same for every single pixel.
There are more complex categories of filter, such as a warp filter (which moves the pixels around), or a sampling filter (which transform a pixel based on the colours of neighbouring pixels). But the concept of “do stuff to each pixel” is the same.
Consider creating your own image processing library.
You might start your proof-of-concept with a naïve implementation, iterating through all the pixels of an image and processing it, applying the resulting colour to a new image (or grid of pixels) at the end.
for x in image.width {
    for y in image.height {
        let originalColor = image.pixel(x, y)
        let newColor = process(pixel: originalColor)
        newImage[x][y] = newColor
    }
}
Notice the problem?
Running this algorithm in series on a CPU core is like sucking a swimming pool through a straw. It feels pretty fast when you’re the guy doing the sucking, but the job is way too big to be efficient.
It is an operation begging to run in parallel.
Hardware Acceleration
Even if we parallelised across the 6 CPU cores in a modern iPhone, it’ll still be pretty slow (and guarantee we clog up our main thread).
Core Image automatically targets the fastest hardware available — back in 2005, this depended on how your Mac was configured, but today this is basically always going to be the GPU.
If you want to impress your co-workers, you can refer to this as hardware acceleration (in general terms, this is whenever a task is handed off from the CPU to specialised hardware).
The GPU of an iPhone 15 Pro has 8 individual cores with 128 total execution units, which can run the simple mathematical operations like they’re nothing.
When we run our naïve pixel-processing operation on the GPU, it’ll run simultaneously for each pixel (well, 128 of them run simultaneously), and might look a little like this:
float4 process(float4 pixel) {
    return process(pixel);
}
This is more akin to you and 127 of the lads emptying the pool out with buckets. Core Image manages all this parallelism internally, and its high-level API means developers don’t even need to think about it.
Lazy Evaluation
You might expect multiple chained filters to perform work in an O(n) fashion, losing performance with each subsequent pass as more processing steps are run, and the memory I/O of intermediate products increases.
Core Image actually implements a clever lazy evaluation, which allows performance of multiple chained filters to (often) work just as fast as individual filters.
The way this works is actually pretty interesting.
The CIFilters themselves are treated as steps in a recipe, with CIImages set up as input and output products for each filter. All this wiring up doesn’t actually perform any work: the processing is lazy, only applied when the final image is requested.
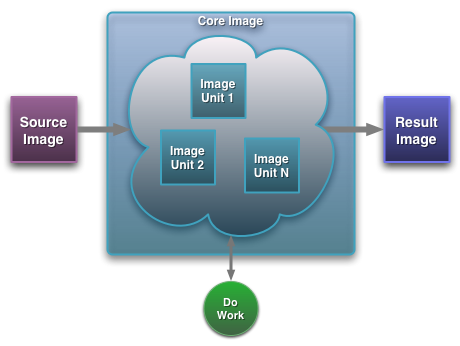
The filter steps and inputs are linked together as a graph data structure. When rendering, Core Image uses a just-in-time compiler to convert this graph into a pixel shader which implements the whole filter chain, which runs on the GPU.
What on Earth is a shader?
I’m really glad you asked.
I’m honestly going to go into a lot of detail on shaders very soon, but if you can’t wait, a shader is essentially a little function that runs on the GPU. They are called shaders because back in the olden days, before colour computer screens were commonplace, they controlled the shading of shapes rendered on-screen.
Read Metal in SwiftUI: How to write Shaders for a detailed, beginner-friendly introduction.
Using Core Image
You can utilise Core Image filters in your apps quite easily. Let’s set up a sample app with, say, a photo of your cat.
(dog people can exit the article now)
Once we add an image to our asset library, it’s not a lot of code to display it in the default SwiftUI app ContentView.
struct ContentView: View {

    @State private var viewModel = ContentViewModel()

    var body: some View {
        Image(uiImage: viewModel.uiImage ?? UIImage())
            .resizable()
            .aspectRatio(contentMode: .fit)

        Button("Apply Filter") {
            viewModel.applyFilter()
        }
        .padding()
    }
}Our creatively-named ContentViewModel is where the magic happens. Let’s go from the top:
CIFilterBuiltins
// ContentViewModel.swift

import CoreImage
import CoreImage.CIFilterBuiltins
import SwiftUI
We’re going to need CoreImage, of course, but CIFilterBuiltins goes a long way towards avoiding Objective-C-era cruft.
Basically, instead of instantiating CIFilters with string-ly typed names:
filter = CIFilter(name: "CIThermal")These builtins offer a type-safe alternative.
filter = CIFilter.thermal()The View Model
Next, we have a few properties on the view model.
// ContentViewModel.swift

@Observable
final class ContentViewModel {

    private let context = CIContext()
    private let originalImage: UIImage?

    var uiImage: UIImage?
    var filter: CIFilter?

    init() {
        originalImage = UIImage(named: "cody")
        uiImage = originalImage
        filter = .thermal()
    }

    // ...
}
The view is displaying the uiImage property, which we will modify with our chosen CIFilter.
I left filter as an internal property so you can play with it later.
Core Image Context
CIContext is the entity which performs all the image processing, memory management, and just-in-time compilation under the hood — it’s pretty expensive to create, so try to stick to one instance and keep re-using it.
Applying a Filter
When a user taps the button, our chosen CIFilter is applied to the image:
func applyFilter() {
    guard let filter,
          let originalImage else { return }
    uiImage = apply(filter: filter, to: originalImage)
}

private func apply(filter: CIFilter, to image: UIImage) -> UIImage {
    // 1
    let originalImage = CIImage(image: image)

    // 2
    filter.setValue(originalImage, forKey: kCIInputImageKey)

    guard let outputImage = filter.outputImage,
          // 3
          let cgImage = context.createCGImage(
        outputImage, from: outputImage.extent
    ) else { return image }
    return UIImage(cgImage: cgImage)
}
There are a few steps to this:
We convert our
UIImageinto aCIImage. As mentioned in the Lazy Evaluation section, this isn’t actually an image — it’s the ‘recipe’ to produce an image. Once it needs to render, it’s lazily computed.We use key-value coding on the
CIFilterto assign the input image, i.e., the original image before processing (or the intermediate in a chain!). Depending on the filter, you can set other values to fine-tune it, e.g.kCIInputRadiusKeyto set the radius for a blur.Finally, we tell the context to render the image, performing the processing in a single step and outputting a Core Graphics image (
CGImage) based on the output image property of the final outputCIImage. We can easily convert this into aUIImage.
Our efforts are rewarded with a cool infrared-camera-style image of Cody.
Now that we’ve mastered the basic-basics, we can begin to make things interesting.
Chaining Filters
Efficiently chaining filters is the killer-app of Core Image.
Once you grasp the concept, it’s super simple: the output of the first CIFilter becomes the input of the next CIFilter.
// ContentViewModel.swift

var filter1: CIFilter = .bloom()
var filter2: CIFilter = .comicEffect()

func applyFilter() {
    uiImage = apply(filter1: filter1,
                    filter2: filter2,
                    to: originalImage)
}

private func apply(filter1: CIFilter, filter2: CIFilter, to image: UIImage) -> UIImage {
    let originalImage = CIImage(image: image)
    filter1.setValue(originalImage, forKey: kCIInputImageKey)
    guard let output1 = filter1.outputImage else { return image }
    filter2.setValue(output1, forKey: kCIInputImageKey)
    guard let output2 = filter2.outputImage,
          let cgImage = context.createCGImage(
        output2, from: output2.extent
    ) else { return image }
    return UIImage(cgImage: cgImage)
}
The only big change here is setting filter1.outputImage as the kCIInputImageKey for filter2.
The rest of the process is identical — again, the content waits for the last moment to lazily apply pixel processing, rendering with createCGImage.
We’re rewarded with a very cool comic-book-panel image.
If you swap the order of filters in the chained recipe, you’ll quickly discover that ordering is important, as we get a very different result with the comic effect before the bloom filter.
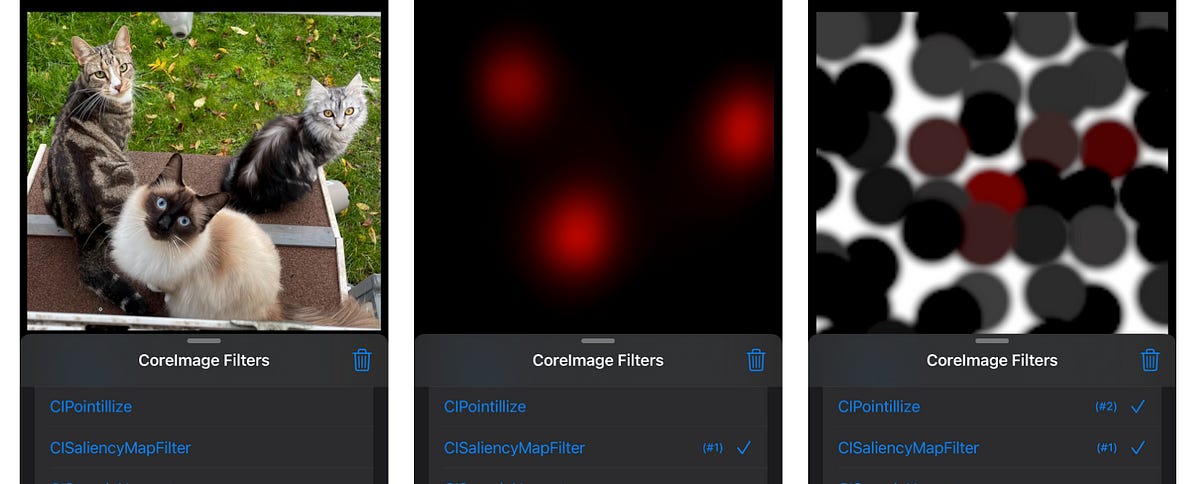
One of my favourite combos is the trippy, abstract combination of .saliencyMap() and .pointillize().
I like this effect because, to me, it seems to zoom in by a factor of 10¹⁵ and look at the air molecules themselves.
Arbitrary Filter Chains
Core Image is powerful, so we can go even further.
Even with a ton of chained of filters, performance is great. Therefore, we can generalise our apply(filters: to:)method to apply an ordered collection of any filters we like.
private func apply(filters: [CIFilter], to image: UIImage) -> UIImage {
    guard let ciImage = CIImage(image: image) else { return image }
    let filteredImage = filters.reduce(ciImage) { image, filter in
        filter.setValue(image, forKey: kCIInputImageKey)
        guard let output = filter.outputImage else { return image }
        return output
    }
    guard let cgImage = context.createCGImage(
        filteredImage, from: filteredImage.extent
    ) else { return image }
    return UIImage(cgImage: cgImage)
}
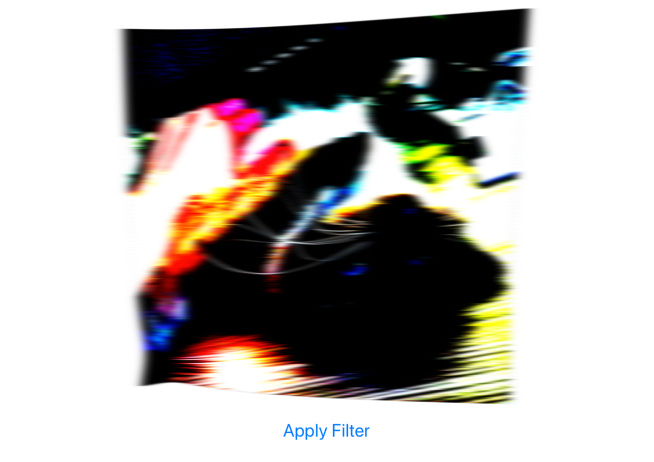
Let’s chain these four filters together:
.colorThresholdOtsu().pinchDistortion().motionBlur().sRGBToneCurveToLinear()
I could honestly play around with this all day.
So I did.
I wanted to discover the best combinations of filters — actually, the best permutations of filters, since order matters.
I found it a slog to do this via trial-and-error. I spent most of my time ping-ponging between the Core Image Filter Reference and Xcode build latency.
Core Image is meant to be fast!
Introducing… CoreImageToy
I distilled the above techniques and developed them into a simple app — an app which is exactly what I needed a few days ago when I began my Core Image learning.
It’s dead simple.
Upload a photo, and apply Core Image filters.
You can chain them together, check their ordering, and reset everything.
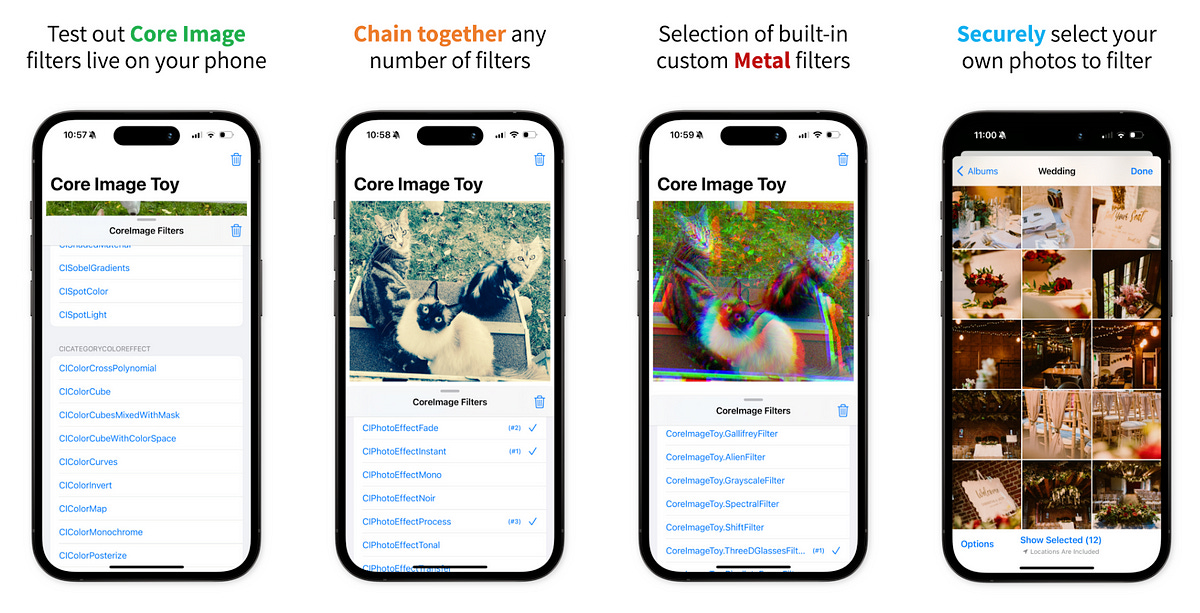
Download CoreImageToy on the App Store today!
Missing Functionality
This app was great for learning the basics of filters and chaining, but it’s an incomplete product. I kept my scope small, meaning I am missing out on three key features:
I have no interface for adjusting fine-tuning parameters beyond the defaults — e.g., the sepia tone filter is locked to 100% intensity rather than allowing adjustment. Dynamically handling all possible attributes in the UI could make the UI overcrowded, and it could be troublesome to create a UI for every permutation of attribute keys. Suggestions welcome!
This app only uses filters which have a
kCIInputImageKey— we are only handling images, and I didn’t want to increase my scope tenfold by dealing with any other asset types. Again, if anyone has an idea about how we can easily demo other kinds of filters without drastically changing the scope of the toy, I’m all ears.I didn’t bother creating any kind of export process, but this is a no-brainer for version #2.
Finally, this app is also not using every single category of filter — again, I only chose categories which worked well when applied to single images.
The full list of Core Image CIFilter categories used are:
kCICategoryColorEffectkCICategoryStylizekCICategoryBlurkCICategoryDistortionEffectkCICategoryColorAdjustmentkCICategoryGeometryAdjustment
Open Sourcing & Release
Sore about the missing functionality? I have good news!
Other than mild embarrassment at my janky filter selection logic, there wasn’t really any reason not to open source it. Check out CoreImageToy on GitHub now!
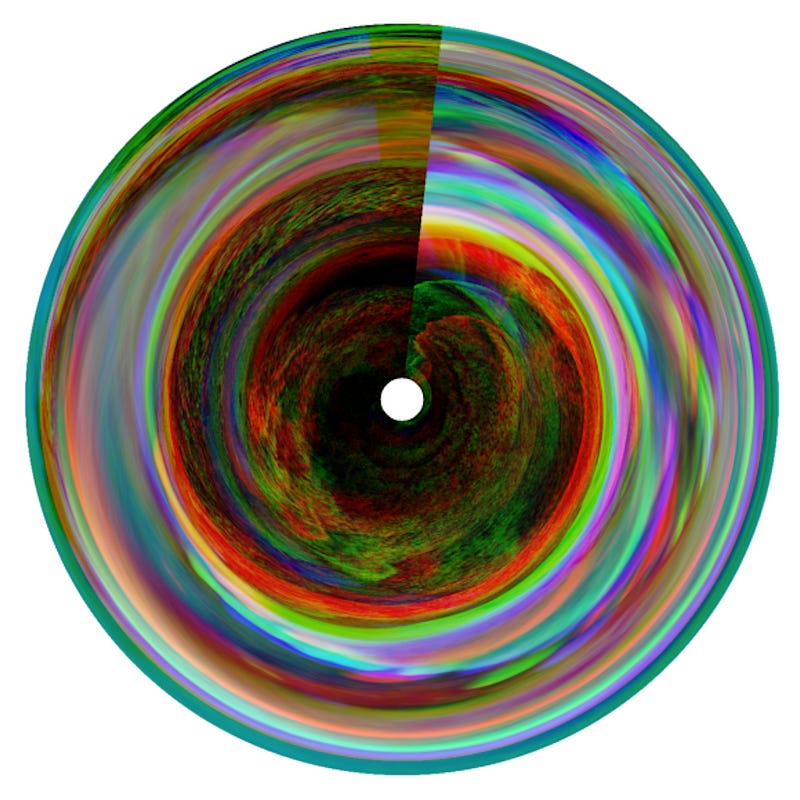
I am fairly happy with the app icon — made via the app itself!
It’s the iPhone stock waterfall photo with a custom 3D-glasses pixel shader applied, chained with a circular distortion to make it look like a photo lens.
Wrapping Up
Did you say pixel shader?
That’s right, CoreImageToy includes my custom Core Image kernels.
These allow you to apply your own Metal shaders to each pixel and realise fully custom visual effects on your images.
Due to the pluggable architecture of Core Image, these custom CIFilters can be chained together with system filters, opening up an infinite variety of image processing permutations — and a killer feature for your camera app.
Tune in next time as we create our own image filters in Metal.
And if you haven’t already, download CoreImageToy on the App Store today and leave a review!
Don’t feel like to subscribing yet? Follow me on Twitter!


