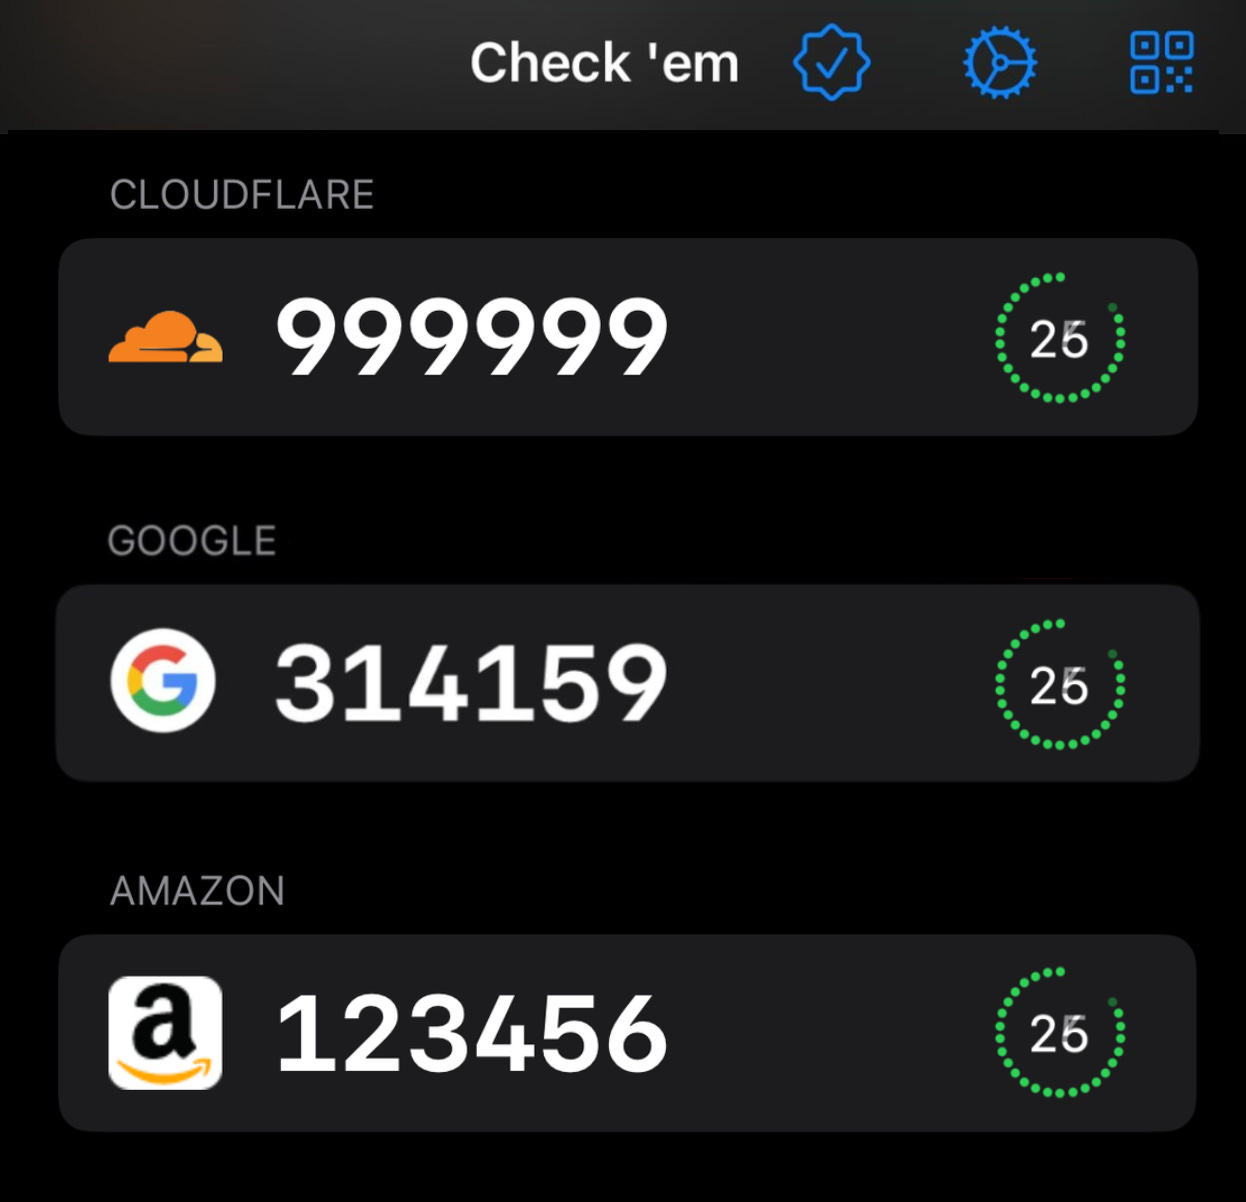
The 2FA app that tells you when you get `314159`
An indie project for early 2010s internet addicts
This was a pretty fun project: not only did I manage to tickle the part of my geek brain which loves spotting patterns; I got to handle some nifty processing, threading, and optimisation problems!
Subscribe to Jacob’s Tech Tavern for free to get ludicrously in-depth articles on iOS, Swift, tech, & indie projects in your inbox every week. Paid subscribers unlock Quick Hacks, my advanced tips series, and get access to my long-form articles 3 weeks before anyone else.
Like all recovered edgelords who came of age in the early 2010s, I somewhat miss the heyday of image-boards like 4chan. They were the final bastion of the wild-west early internet before the nazis ruined everything.
One of the classic memes was GET, where you’d take intense pride in correctly anticipating your randomly-generated post ID containing an interesting sequence of numbers.
These days, now that all the normies have grown up and found jobs, the closest we get to the magic of yesteryear is multi-factor authentication codes.
If you know, you know.
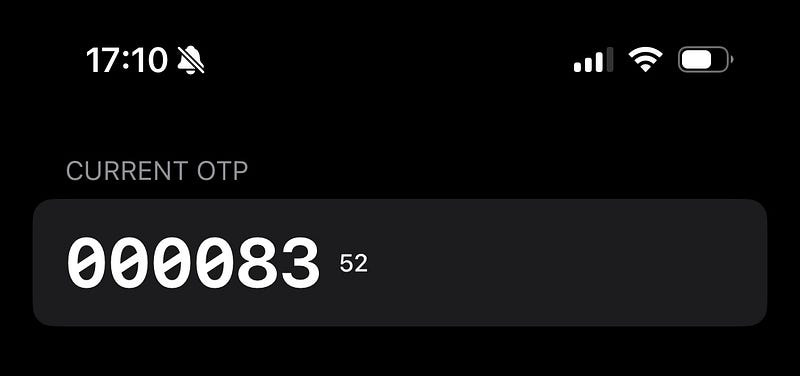
The drudgery of having to re-authenticate with your bank, your email, or your cloud services. The little glimmer of joy when you get a really nice number like 787000 or 123450.
Inspiration hit.
These MFA codes use a common algorithm which refreshes every 30 seconds. We’re only exposed to a tiny sliver of the dubs, trips, quads, quints, and sextuples possible in our 6-digit authentication codes.
As with all my indie projects, I had a singular clear vision around which I can build:
What if your 2FA app told you every time a cool number came up?
I knew what I had to do.
If you love apps but hate reading, skip ahead to download Check ’em: The Based 2FA App today!
The Proof of Concept
I don’t need many moving parts to find out whether this works.
Enter 2FA secret keys.
Generate 6-digit 2FA codes locally.
Send push notifications when quads/quints/sexts are generated.
The Minimum Viable Product
If the concept — getting notifications when cool 2FA numbers appear — holds up, then I could turn this into a real app with a few key features:
Capture 2FA secrets with the camera.
Store multiple 2FA codes
Implement more numerical patterns.
Let users choose which patterns they want to know about.
I knew I was onto something: 90% of the people I explained this to thought I was a moron. The other 10% saw only sheer brilliance.
Building the Proof of Concept
TOTP
TOTP, or time-based one-time password, is a surprisingly simple concept. It’s an authentication process which uses two inputs:
A secret key, stored on both the authentication service and your own device.
The current time, or, more specifically, the number of 30-second intervals which have elapsed since unix time.
An algorithm deterministically hashes these two inputs to create the 6-digit codes you know and love. This hashing algorithm is pretty cookie-cutter, found in Apple’s CryptoKit. Thanks to our friends at the Apple forums, here’s the full TOTP algorithm in all its glory:
// CodeGenerator.swift

private let secret = Data(base64Encoded: "AAAAAAAAAAAAAAAAAAAAAAAAAAA")!

func otpCode(date: Date = Date()) -> String {
    let digits = 6
    let period = TimeInterval(30)
    let counter = UInt64(date.timeIntervalSince1970 / period)
    let counterBytes = (0..<8).reversed().map { UInt8(counter >> (8 * $0) & 0xff) }
    let hash = HMAC<Insecure.SHA1>.authenticationCode(for: counterBytes, using: SymmetricKey(data: secret))
    let offset = Int(hash.suffix(1)[0] & 0x0f)
    let hash32 = hash
        .dropFirst(offset)
        .prefix(4)
        .reduce(0, { ($0 << 8) | UInt32($1) })
    let hash31 = hash32 & 0x7FFF_FFFF
    let pad = String(repeating: "0", count: digits)
    return String((pad + String(hash31)).suffix(digits))
}
To make sure this worked right; I set up 2FA on my Google account, and displayed the secret in my app using the algorithm.
And, like magic (after some annoying base32 to base64 conversion), Google accepted my 2FA!
Now that we’ve got the bare bones of our 2FA working, we can implement the final piece of the proof of concept puzzle: generating notifications.
App Limitations
Our key limitation lies in our mobile device.
We can’t actually keep a background process such as 2FA generation running forever, and certainly can’t store user secrets on a backend push server.
Therefore, to make this concept work, we have to be a sneaky: precompute 2FA codes into the future, and schedule delivery for the time at which they appear in real life.
Additionally, we can only schedule 64 pushes on iOS at any time, so we should:
Save a notification or two asking users to re-enter the app.
Incentivise users to open the app via tapping the notifications, toggling a re-computation of the 2FA codes.
Now we know how our POC will work, let’s get building.
Finding our First GETs
Let’s jazz up our lowly 2FA code.
We plan to pre-compute many codes, then implement some kind of regex to detect whether each code is a GET — worthy of checking ‘em.
My super-simple SwiftUI view can display these codes handily, using a UICollectionView-backed List to ensure decent performance (the vanilla VStack in a ScrollView would begin creaking far before 10,000 items!).
// ContentView.swift

struct ContentView: View {

    var body: some View {
        List {
            ForEach(makeOTPs(), id: \.self) {
                Text($0)
                    .fontDesign(.monospaced)
                    .font(.title)
                    .kerning(4)
            }
            .frame(maxWidth: .infinity)
        }
    }

    func makeOTPs() -> [String] {
        (0..<10_000).map {
            otpCode(increment: $0)
        }
    }
}
Looking good so far.
Now, we can add a simple regex-based evaluator to check for trips — that is, a TOTP containing a sequence of three matching digits such as 120333.
extension String {
    func checkThoseTrips() -> Bool {
        (try? /(\d)\1\1/.firstMatch(in: self)) != nil
    }
}
We add a fontWeight modifier to our Text views to easily detect these GETs when we’re scrolling.
Text($0)
    .fontWeight($0.checkThoseTrips() ? .heavy : .light)
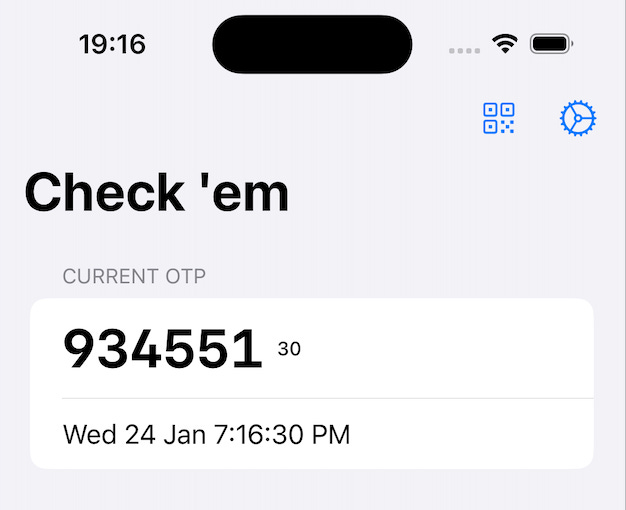
Et viola! Check those trips!
We can even make a basic modification to the our regex to detect the hallowed quads — I’ll leave this as an exercise to the reader.
A Pointless but Interesting Observation
Our careless ForEach implementation causes a warning:
ForEach<Array<String>, String, Text>: the ID 312678 occurs multiple
times within the collection, this will give undefined results!
We actually get dozens of this warning!
Since we generated 10,000 OTPs, it’s extremely likely that several match — this is the same as the birthday problem, where the number of pairs of possible matches is well over a million.
Producing Rare GETs
Let’s start calculating some interesting codes.
The key here is precomputing to look ahead into the future: TOTP is a deterministic hash of the secret and date inputs. Therefore, we can feed a long sequence of dates in the future to determine which OTP code you see at what time.
Let’s adjust to our OTP generation to return both the code and date:
// TOTP.swift

struct OTP {
    let date: Date
    let code: String
}

func otpCode(date: Date = Date(), increment: Int = 0) -> OTP {
    let digits = 6
    let period = TimeInterval(30)
    let adjustedDate = date.addingTimeInterval(period * Double(increment))
    let counter = UInt64(adjustedDate.timeIntervalSince1970 / period)
    let counterBytes = (0..<8).reversed().map { UInt8(counter >> (8 * $0) & 0xff) }
    let hash = HMAC<Insecure.SHA1>.authenticationCode(for: counterBytes, using: SymmetricKey(data: secret))
    let offset = Int(hash.suffix(1)[0] & 0x0f)
    let hash32 = hash
        .dropFirst(offset)
        .prefix(4)
        .reduce(0, { ($0 << 8) | UInt32($1) })
    let hash31 = hash32 & 0x7FFF_FFFF
    let pad = String(repeating: "0", count: digits)
    let code = String((pad + String(hash31)).suffix(digits))
    return OTP(date: adjustedDate, code: code)
}
To test this, let’s generate a ton of these codes, and search for the full-house of GETs: quints.
func interestingCodes() -> [OTP] {
    (0..<1_000_000)
        .map { otpCode(increment: $0) }
        .filter { $0.code.checkThoseQuints() }
}
After some number crunching while my M1 runs the hashing function — about 30 seconds of it — we arrive at some seriously checkable GETs.
Scheduling our Notifications
Fun as it is to see great numbers, the app concept is no better than a random-number generating machine if you can’t really use the GETs in real life for your real authentication.
Now that we know when the interesting numbers are arriving, we want to queue up a push notification so we catch the number live:
// NotificationScheduler.swift

private func createNotification(for otp: OTP) {
    let center = UNUserNotificationCenter.current()
    let content = UNMutableNotificationContent()
    content.title = "Quads GET!!"
    content.body = otp.code
    content.sound = UNNotificationSound.default
    let components = Calendar.current.dateComponents([.year, .month, .day, .hour, .minute, .second], from: otp.date)
    let trigger = UNCalendarNotificationTrigger(dateMatching: components, repeats: false)
    let request = UNNotificationRequest(identifier: UUID().uuidString, content: content, trigger: trigger)
    center.add(request) { (error) in
        // ...
    }
}
These are scheduled right after generating the interestingCodes we use in our view. A short while later, I got 2 wonderful push notifications at once!
This became more exciting when I confirmed this notification corresponded with the number appearing in reality!
This app has now been elevated beyond a random number generator: this code really works for signing into my Google account.
Interestingness
To determine different types of interesting number, we need to introduce the concept of interestingness. This could include, non-exhaustively, a few potential kinds of number sequence:
Repeated numbers
Consecutive digits
Other mathematically interesting numbers (e.g.
piore)Palindromes
These types of interesting number can be enumerated as… well, as an enum case, optionally created for each OTP we generate.
// Interestingness.swift

enum Interestingness {

    case sexts
    case quints
    case quads

    init?(code: String) {
        if code.checkThoseSexts() {
            self = .sexts
        // ...

    var title: String {
        switch self {
        case .sexts: return "Sextuples GET!!!"
        // ...

    func body(code: String) -> String {
        switch self {
        case .sexts: return "Check those sexts: \(code)"
        // ...
Each checkThose method we use wraps a different regex, and we run them in order of what we care about most — for instance, sextuples is 100x rarer than quads.
A long-overdue refactor later and we’ve created our proof-of-concept. Let’s recap:
The app allows me to enter a (hardcoded) 2FA secret key.
The app generates a 6-digit 2FA code locally, every 30 seconds.
The app schedules push notifications that show up when quads, quints, and sexts are generated.
I’m going to take a break to play with the app for a few days. I suspect I might have the basis for a cool app on my hands.
Building the Minimal Viable Product
I’ve been using the app, the bare-bones POC containing the kernel of my idea, for a few days now. And I LOVE it. I can’t wait until the first time I get sextuples.
Now’s the time to add some meat on the bones and build a fully-fledged 2FA app around the concept. As I laid out before, this really only requires 4 major new features:
Scanning 2FA QR codes and store them securely on the keychain.
Displaying and managing multiple 2FA accounts in the UI.
Letting users set the numbers they care about.
Implementing more kinds of interestingness.
Lastly, a non-functional requirement: I’ll need to do some work optimising the very slow code generation — maybe using batching or local persistence.
Human Interface Guidelines
I have no intention of doing anything fancy with the design — the standard apple List view components will take me far, conforming to the HIG out of the box.
Let’s keep our UX nice and simple: I know the functionality primarily lives in the push notifications; and it’s pretty perfect. That means hiding the QR scanner and settings behind toolbar buttons that display modal flows.
Scanning 2FA Secrets
A couple of open-source libraries will save me a ton of time on cookie-cutter tasks. CodeScanner to supply simple SwiftUI QR code scanning, and KeychainAccess to easily store these 2FA account secrets in the keychain.
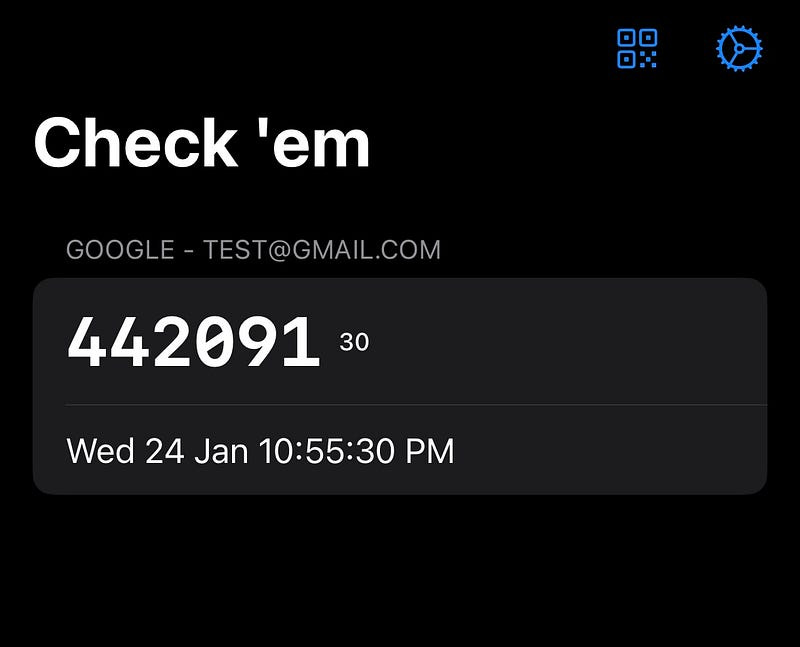
This scanner library uses camera access to turn QR codes into easily-parseable URLs like this:
otpauth://totp/Google%3Atest%40gmail.com?secret=bv7exx7sltbcqffec1qyxscueydwsu5h&issuer=GoogleNow, we can easily get our accounts into the app!
Picking the Numbers You Like
Using SwiftUI @AppStorage, alongside a List and some Toggles, we can easily build a user settings screen.
I used a closure in onDisappear to tell the parent view to begin number crunching again and re-schedule the notifications. This was the simplest way I to batch everything up, rather than running expensive computation each time a toggle changed.
// CodeView.swift

var body: some View {
    // ...
    .sheet(isPresented: $showSettings) {
        SettingsView(onDisappear: {
            viewModel.recomputeNotifications()
        })
    }
}
Belated Customer Research
Look, I’m an indie dev, I’m allowed to do this halfway through the build process!
I decided to download a few other 2FA apps to see if there were any ideas I could copy. Frankly, I expected a pretty crowded and competitive app market, but some of these were truly terrible.
Seriously, more than 50% of them threw up an extremely aggressive paywall before you could use them… when there are perfectly good free options.
Does nobody make apps for fun anymore?
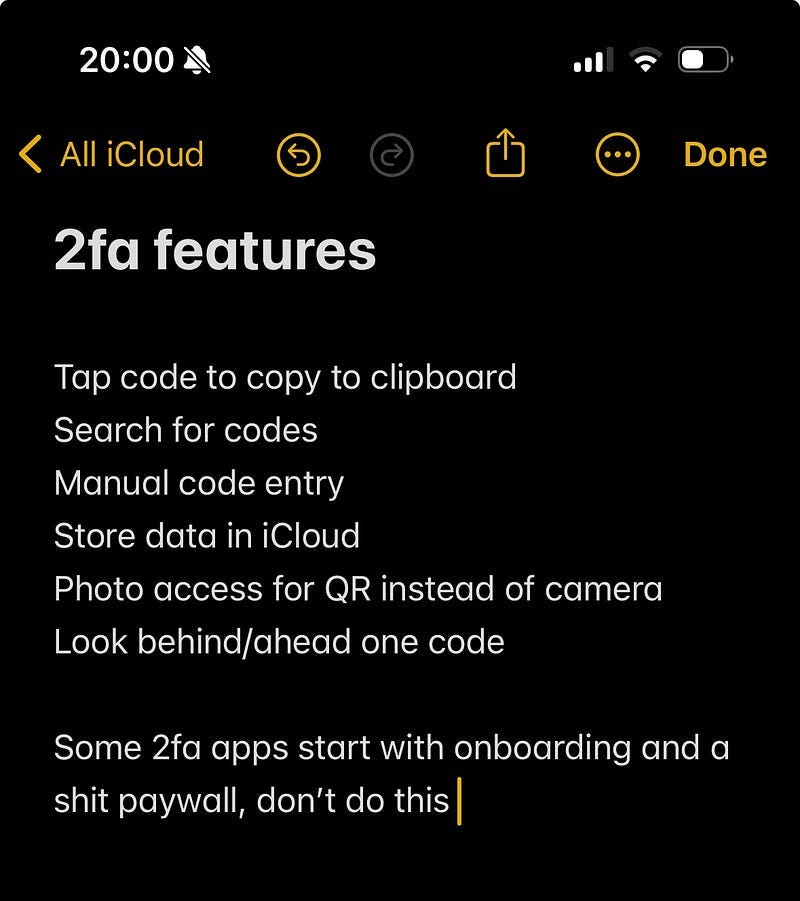
Despite this paywall menagerie, I did manage to note down a few good ideas to borrow.
Multiple 2FA Accounts
This is, of course, pretty critical for anyone that has more than one account. More accounts also means more opportunities for rare GETs!
Updating my keychain code, now we can scan multiple QR codes, persisted our account data (including the secret), and they worked perfectly for logging me into my various accounts!
I also implemented the proper built-in List functionality, so we can swipe-to-delete codes we don’t need anymore.
While doing my competitor analysis, I discovered that the Google Authenticator kept all my 2FA codes from years ago, which I’d added on my previous iPhone!
I realised then I was making two mistakes with my data layer.
Not synching with iCloud
Trying to persist Accounts outside the keychain
Firstly, synchronising our keychain to iCloud means accounts appear on all your other Apple devices. This is a piece of cake with the Keychain Access library:
// KeychainManager.swift

self.keychain = Keychain().synchronizable(true)
Secondly, I was suffering from shiny-object syndrome: in my haste to use SwiftData as a persistence layer, I was only using the Keychain for the secrets, and persisting the rest of the Account metadata through the new framework.
This meant I couldn’t get my accounts on any other device — the secret on its own is useless!
Therefore, I realised I had to place the whole Account on the keychain.
My new approach keeps the QR code URL on the keychain in its entirety. Now, the Account object itself is ephemeral; re-computed from the URL every time the app loads.
This means the Accounts can appear on any iDevice you’re signed in to! This ephemeral approach neatly kills two birds with one stone. Now we use the Accounts from the keychain when we need to fetch them at load:
// AccountManager.swift

func fetchAccounts() throws -> [Account] {
    try KeychainManager.shared.fetchAll()
        .compactMap { createAccount(from: $0) }
}

private func createAccount(from urlString: String) -> Account? {
    guard let url = URL(string: urlString),
          let account = SecretURLParser.shared.account2FA(from: url) else {
        return nil
    }
    return account
}
My code is a little bit spaghetti, but the final app was about 1,500 LoC in total — I’ll rebuild it using a proper DI framework when I want to write an article about DI. If you’re a junior engineer, please don’t try this at home!
I did a lot of generic coding work to improve the UI and refactor the code nicely, but there were also a few gems in my development process that were pretty interesting.
Finding Account Icons
This is very much a nice to have, but the best open-source app did the same, so I felt I had to at least be as good as that.
Fortunately, there is a little-known Google API which crawls the web for FavIcons on websites and allows you to download them at several resolutions.
How do I work out the website? I found pretty good results by simply using the issuer property on the QR code and trying the .com.
struct FavIcon {

    let url: URL

    init(issuer: String) {
        let domain = "\(issuer).com"
        let url = URL(string: "https://www.google.com/s2/favicons?sz=128&domain=\(domain)")!
        self.url = url
    }
}
Here I used the CachedAsyncImage library to get blazingly-fast loading performance on the icons.
I also added a Metal shader to handle background removal, and make the icon pop a little more.
Here’s the SwiftUI View extension:
//  View+ColorEffect.swift

import SwiftUI

extension View {

    func eraseBackground(backgroundColor: Color = Color(uiColor: UIColor.secondarySystemBackground)) -> some View {
        modifier(EraseBackgroundShader(backgroundColor: backgroundColor))
    }
}

struct EraseBackgroundShader: ViewModifier {

    let backgroundColor: Color

    func body(content: Content) -> some View {
        content
            .colorEffect(ShaderLibrary.eraseBackground(
                .color(backgroundColor)
            ))
    }
}
And of course the MSL shader code:
#include <metal_stdlib>
#include <SwiftUI/SwiftUI_Metal.h>
using namespace metal;

[[ stitchable ]]
half4 eraseBackground(
    float2 position,
    half4 color,
    half4 backgroundColor
) {

    if (color.r >= 0.95 && color.g >= 0.95 && color.b >= 0.95) {
        return backgroundColor;
    }

    return color;
}
Here’s how they look. They’re not bad, but not amazing.
I’ve started over-engineering. Let’s stick a pin in this and see how we feel later.
Polishing the UI
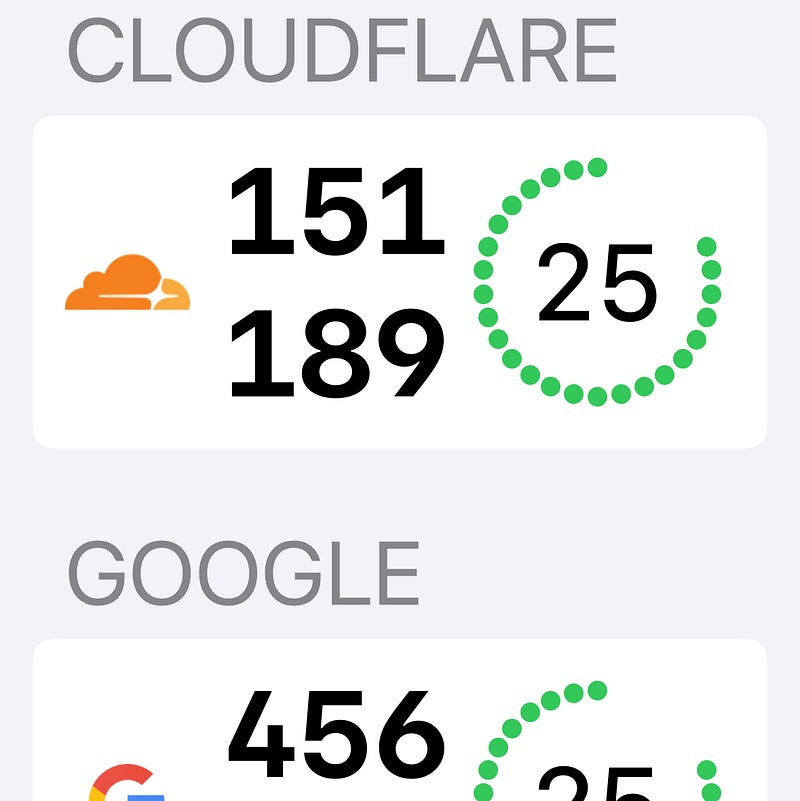
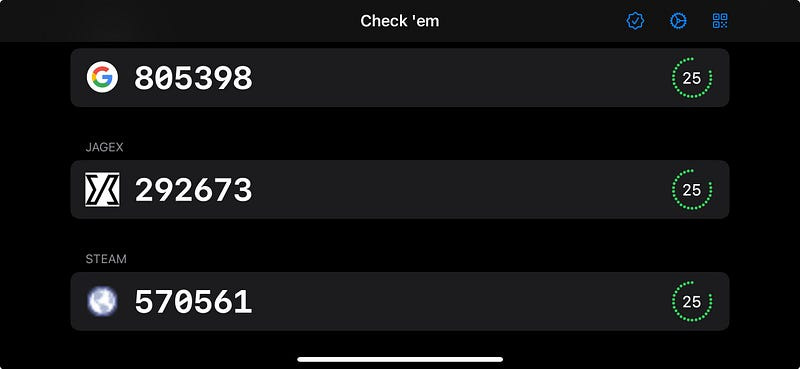
It’s working pretty well now as a basic 2fa app in its own right.
Who would have thought that to be ahead of most of the pack, I just had to not have an extremely aggressive paywall ($4.99 per week? Seriously?!)
After some boilerplate software development work on the timings, the basic UI, and the data storage, it’s really working quite nicely now — sticking to the basic SwiftUI components is a brilliant way to ensure stuff “just works”*.

*and helps make everything accessible!
I also implemented some nice QoL features I found through my competitor research such as tap-to-copy.
I utilised accessibility tools like @ScaledMetric and ViewThatFits to ensure the app works great regardless of your visual needs. I even get light mode for free out of the box by sticking closely to Apple’s basic SwiftUI components and colours.
// AccountView.swift

@ScaledMetric(relativeTo: .largeTitle) private var iconSize: CGFloat = 36

private var icon: some View {
    CachedAsyncImage(url: FavIcon(issuer: account.issuer).url, content: {
        $0
            .resizable()
            .aspectRatio(contentMode: .fit)

    }, placeholder: {
        Text(String(account.issuer.first?.uppercased() ?? account.name.first?.uppercased() ?? ""))
            .font(.largeTitle)
            .monospaced()
    })
    .frame(width: iconSize, height: iconSize, alignment: .center)
}

private var code: some View {
    ViewThatFits {
        HStack(alignment: .center, spacing: 16) {
            codeText
        }
        VStack(alignment: .leading, spacing: 4) {
            codeText
        }
    }
}Making the App More Interesting(ness)
To improve the true core value proposition, I implemented a lot more options for interestingness:
Sexts, quints, and quads like
000000Counting sequences like
012345Hundred-thousands like
300000Units like
000001and tens like000010Maths constants like pi (
314159)Physics constants like Planck's constant,
661034(6.6x10⁻³⁴)Palindromes like
012210Repeated twos and threes like
121212and123123
Some of these were fun little leet-code puzzles to implement, some were annoying regexes, while some were very straightforward.
func checkThatCounting() -> Bool {
    let characters = Array(self)
    for i in 1..<characters.count {
        if let prevDigit = Int(String(characters[i - 1])),
           let currentDigit = Int(String(characters[i])),
           currentDigit != prevDigit + 1 {
            return false
        }
    }
    return true
}

func checkThatPalindrome() -> Bool {
    self == String(self.reversed())
}

func checkThoseRepeatedThrees() -> Bool {
    self.prefix(3) == self.suffix(3)
}

func checkThoseHunderedThousands() -> Bool {
    suffix(5) == "00000"
}
Probability Theory
Now I’ve updated the Settings UI so that you can sort by either rarity (common, rare, and ultra-rare), or by type (such as repetitions, constants, sequences, or round numbers).
How do I calculate the probabilities of each rarity level?
For perfect counting sequences like 012345, there are only 6 possible sequences (up to 567890) out of one million possible number combinations.
30 seconds times 1 million combinations, divided by 6 possible sequences, means for each account you might only expect a perfect counting sequence to occur on average every 5 million seconds — that is, every 58 days on average.
This is pretty ultra rare.
However, palindromes such as 123321, have 1000 possible 3-sequence numbers that make them up. This means you could see them every 0.34 days on average! Much more common.
In the middle, something like repeated twos (e.g. 141414) have 100 possible numbers (00 to 99), so they happen every 3.5 days on average. So, pretty rare, but not ultra-rare.
Some of these sequences, like quads, are a little tougher to number crunch, so it was simpler to generate tens of millions of OTPs and counting the incidence of each kind of interestingness, to get a feel for their relative frequency.
Improving Performance
The app can process 64 interesting 2FA codes quite quickly, but only when I have all the common Interestingnessenabled. When I only want ultra-rare GETs, the processing takes a long time.
I need to invoke chunking — while crunching through millions of potential OTPs, returning and scheduling a notification as soon as a valid interesting code is discovered.
My old friend the Combine framework gives us a neat solution!
// CodeGenerator.swift

var codeSubject = PassthroughSubject<OTP, Never>()

func generateCodes(accounts: [Account]) {
    // ...
    codeSubject.send(otp)
}
I also used some Tasks so that we can cancel and re-start computation in case, for instance, a user changes their settings mid-processing. Detaching the tasks ensures the heavy processing for our crypto and string analysis operations keeps off the UI thread.
// CodeViewModel.swift

private var otpComputationTask: Task<Void, Never>?
private var notificationSchedulingTask: Task<Void, Never>?

func recomputeNotifications() {
    handleNotificationScheduling()
    handleOTPComputation()
}

private func handleNotificationScheduling() {
    notificationSchedulingTask?.cancel()
    notificationSchedulingTask = Task.detached(priority: .high) {
        guard await NotificationScheduler.shared.isAuthorized() else { return }
        NotificationScheduler.shared.cancelNotifications()
        for await (code, count) in CodeGenerator.shared.codeSubject.values {
            try? await NotificationScheduler.shared.scheduleNotification(for: code)
        }
    }
}

private func handleOTPComputation() {
    let accounts = accounts
    otpComputationTask?.cancel()
    otpComputationTask = Task.detached(priority: .high) {
        guard await NotificationScheduler.shared.isAuthorized() else { return }
        CodeGenerator.shared.generateCodes(accounts: accounts)
    }
}
Now the scheduling works pretty smoothly, coming out in sequence instead of a single large chunk!
Scheduled repeatedTwos: 292929 @ 2024-02-25 23:33:30 +0000
Scheduled repeatedTwos: 878787 @ 2024-02-26 06:03:30 +0000
Scheduled quints: 666660 @ 2024-02-26 10:54:00 +0000
Scheduled quints: 255555 @ 2024-02-26 21:11:00 +0000
Scheduled repeatedTwos: 606060 @ 2024-02-26 23:27:00 +0000
Scheduled sexts: 666666 @ 2024-04-16 23:22:00 +0000
Scheduled boltzmannConstant: 141023 @ 2024-04-19 02:05:00 +0000
Scheduled counting: 012345 @ 2024-04-20 04:51:30 +0000
Scheduled planksConstant: 661034 @ 2024-04-20 05:38:00 +0000
The App Icon
This was the one that got away killed me. I’m desperate to use the real check ’em meme for the app icon. It’s simply perfect.
However, my good friend pointed out that our friends over at Lionsgate films might be feeling a little litigious.
But I had to have it!
Perhaps there is hope after all:

Unlike you, I have faith in the American copyright system.
Now we play the waiting game.
Crickets.
I’ve lost all faith in the American copyright system. Goddammit, Bob Iger, whatever happened to fair use?!
This is the best I could get from DALL-E 3. It has the wrong number of fingers, and it’s the wrong side of the hand, but after trying to prompt-engineer something better for several hours I am resigned to it.
DALL-E really didn’t like drawing the back of a hand. I tried.
Final Touches
The concept was proven. The app works well! Time for some polish and pet features before we show the world the joy of Check ‘em.
I created a list of TODOs — new features and bug-fixes — that I could implement in my V1 before I made my first release.
// High priority -
// TODO: - Add ordering as a query item to the stored URL in the keychain
// TODO: - Haptic buzz on refresh
// TODO: - Only request push notifications when they have entered the Settings Screen
// TODO: - Add settings link to enable notifications
// TODO: - Bug - Ignore scanned duplicates in the view model accounts - don't append scans to accounts if it's already there
// TODO: - Cancel processing tasks when opening Settings view
// TODO: - Push notification deep links to an app review prompt, when the GET is still present
// TODO: - Ultra-rare GETs not being sent?? Can't make them happen locally in simulator, but quints are fine - they appear to be queued
// TODO: - Bug - Progress view doesn't appear on the second load
// TODO: - Bug - Ignore scanned duplicates in the view model accounts - don't append scans to accounts if it's already there
// TODO: - Bug - There's a bug where the percentage fluctuates up and down when there are 2 concurrent calculations
// TODO: - Add TipKit to QR and Settings

// Low priority -
// TODO: - Use @SceneStorage for state restoration; so we aren't waiting ages for the keychain operations
// TODO: - Look back/forwards one code
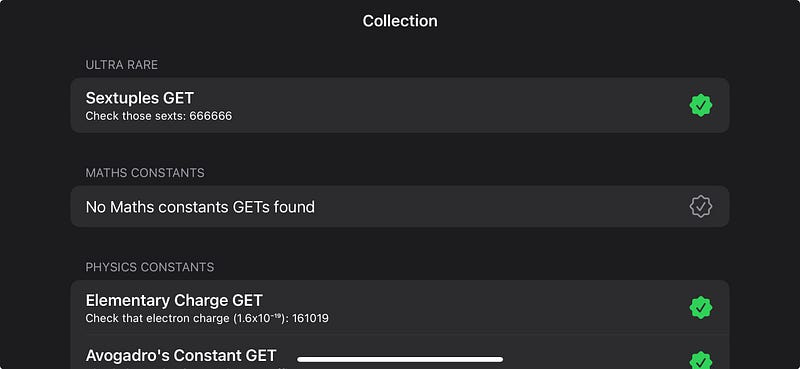
// TODO: - Create a "collection" screen using deep links - collecting the seen GETs as stored items (with a dictionary on the keychain)
Naturally, since I don’t have a product manager in sight, I immediately began work on the lowest-priority task: building out a collection with deep links — I don’t want my rare GETs to go to waste!
Collections
This piece actually helps with a problem we identified original proof of concept: we need to incentivise users to re-enter the app by making users interact with the notifications.
Creating a collect-a-thon is a little tricky, because there are a few moving parts:
Allow users to tap on notifications and deep link into the app.
Securely store the interestingness of the code they tapped.
Render these into a collection screen.
Adding a deep link to the notification was fairly simple.
// Notifications.swift

// ...
content.userInfo = ["deepLink": "checkem://\(otp.code)"]
But, a little annoyingly, I had to create an AppDelegate to handle the notifications — SwiftUI doesn’t quite handle these well on its own yet.
// AppDelegate.swift

func userNotificationCenter(_ center: UNUserNotificationCenter,
                            didReceive response: UNNotificationResponse,
                            withCompletionHandler completionHandler: @escaping () -> Void) {

    let userInfo = response.notification.request.content.userInfo

    if let deepLinkString = userInfo["deepLink"] as? String,
       let deepLinkURL = URL(string: deepLinkString) {
        guard let code = deepLinkURL.code else { return }
        try? CollectionManager.shared.save(code: code)
    }

    completionHandler()
}
Finally, I lazily added a long, comma-separated list of stored codes in the Keychain.
// KeychainManager.swift

func storeCollectionItem(code: String) throws {
    var collection = try keychain.get(Constants.collectionKey) ?? ""
    if !collection.isEmpty {
        collection.append(",")
    }
    collection.append(code)
    try keychain.set(collection, key: Constants.collectionKey)
}
This was more a product of a desire to release fast rather than a well-thought-out engineering decision, one I will come to regret if my power-users approach the soft limit of 4kB per Keychain item (the hard limit is more like 16MB, so I should be okay!).
This work paid off rapidly though, as the collection screen quickly started filling up with my rare GETs!
I originally hid the collection until a user had tapped a notification, but I realised it was far more compelling to entice a user to collecting ’em all by showing them the menu option.
Haptics
The iOS 17 sensoryFeedback API gives us some extremely subtle haptics to play with, so subtle in fact that I didn’t like them. So I ripped out the Haptic Engine from Carbn and reused it here.
I simply added a truly atrocious side effect to my existing refresh code:
// CodeView.swift

.onReceive(timer) { _ in
    let didChange = viewModel.refresh()
    if didChange {
        HapticEngine.shared.play(haptic: .refresh)
    }
}
Don’t try this at home, kids!
Image loading bug
There’s a bug where the CachedAsyncImage library is eagerly loading the non-existent FavIcons, yielding a blurry globe… But I think I will release with this.
It works pretty much 90% of the time, and I’d rather ship than replace one of my pet third-party SwiftUI libraries.
The Duplication Bug The Duplication Bug
Some of the other bugs, I was a little more attentive to before shipping — this one in particular was pretty bad, since someone might scan a QR code twice and get a weird duplicate of the same account.
// TODO: - Bug - Ignore scanned duplicates in the view model accounts - don't append scans to accounts if it's already thereFar from ripping out and replacing a time-saving library, this bug had a single-line-of-code fix.
// CodeViewModel.swift

func create(account: Account, url: URL) throws {
    guard !accounts.contains(where: { $0.name == account.name }) else { return }
    // ...
}
Since the Keychain is keying 2FA accounts based on the name, this fix is pretty sensible.
Codes Not Loading
I found another issue with codes not being queued.
// TODO: - Ultra-rare GETs not being sent?? Can't make them happen locally in simulator, but quints are fine - they appear to be queuedIt turns out, I misunderstood how @AppStorage actually behaves — the default only applied to the UI, as opposed to actually storing something in user defaults.
// SettingsView.swift

@AppStorage("sexts") private var sexts: Bool = true
A function to populate UserDefaults on the first app load solved this.
// CheckEmApp.swift

@main
struct CheckEmApp: App {

    init() {
        initializeDefaultsIfRequired()
    }

    // ...

    func initializeDefaultsIfRequired() {
        guard UserDefaults.standard.object(forKey: "sexts") == nil else { return }
        CodeGenerator.shared.initializeDefaults()
    }
TipKit
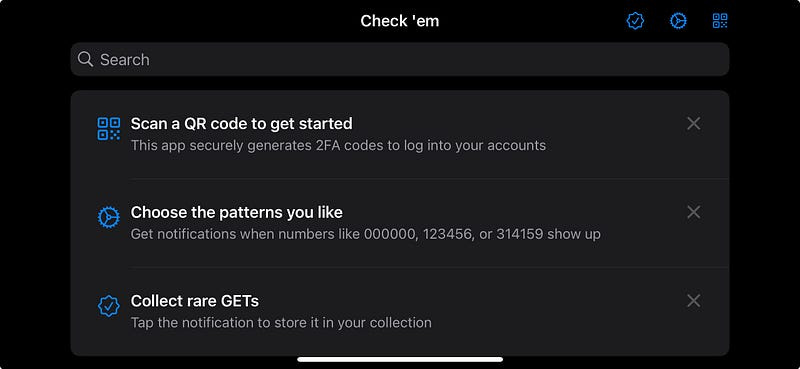
One little bit of improvement used the new iOS 17 TipKit to give a user a bit of an idea of what to do when they first load into the app.
This was surprisingly simple to implement with the new API.
// CodeView.swift

@ViewBuilder
private var tips: some View {
    TipView(QRTip()).tipImageSize(CGSize(width: tipImageSize, height: tipImageSize))
    TipView(SettingsTip()).tipImageSize(CGSize(width: tipImageSize, height: tipImageSize))
    TipView(CollectionTip()).tipImageSize(CGSize(width: tipImageSize, height: tipImageSize))
}
The Store Listing
I think we’re ready to ship.
Setting up our store listing via AppScreens, the coup de grâce second screenshot shows the true power of Check ’em (featuring my cats).
Seriously?
Look, I’m not the most libertarian person in the world, but I don’t want to jump through several extra hoops to increase my target market by 1%. Do better!
(Sorry to all my French readers)
In short order, we’re set up on App Store Connect and ready to press the button!
Download Check ’em: The Based 2FA App today!
Conclusion
Thanks for reading along with my journey!
This was a pretty fun project: not only did I manage to tickle the part of my geek brain which loves spotting patterns; I got to handle some nifty processing, threading, and optimisation problems!
My next step is focusing fully on performance for the v1.1 release, so it loads up crunches the OTPs even faster than normal!
If you love this app, please give your suggestions on numbers you’d like to see! Finally, if anyone is keen to see an Android version, I’m more than happy to share my source code let you to run with it.














I'm probably in the 10% weirdos camp because I find this brilliant 🙃.
But one thing that isn't clear to me from reading the post (OK, OK, I stopped half-way through because it's *long*): when do you actually send the notifications? In my mind, you'd send them like 5 minutes before the interesting codes become valid so that the receiver can manually open the app and *type* the neat code! Not sure if that's what you are doing.
I honestly love projects like this because they remind me of the wilder days of the internet. Usually, I am just browsing for the best video to live photo but a 2FA app that tracks cool patterns is a genius level of nerdy. It is definitely more entertaining than my standard authenticator. I cannot wait to see if I get 314159 on my screen. It is such a cool idea.
https://livephoto.video/